Getting Started with Filejoker: A Step-by-Step Guide
Filejoker offers a cloud storage solution for uploading, storing, and sharing files. Whether you need a place for personal backups or a way to distribute files to others, getting started with Filejoker is relatively straightforward. This guide will walk you through the essential steps, from creating an account (including the free option) to uploading, downloading, and sharing your files. We’ll cover the process for both free and premium users where applicable, ensuring you can navigate the platform effectively regardless of your chosen tier.
Creating Your Filejoker Account
While you can download files shared by others without an account, registering unlocks features like free storage (50 GB according to Filejoker) and the ability to manage your own uploads. Here’s how to sign up:
Open your web browser and go directly to the Filejoker registration page. Based on research and external guides (like ViooMax), the specific URL for registration is:
https://filejoker.net/?op=registration
Note: Clicking the standard “Sign Up” links on some Filejoker pages might redirect to premium purchase options. Using the direct registration link seems to be the most reliable way to access the free account signup form.

Step 2: Fill in Your Details
On the registration page, you will find a simple form requiring:
- Email: Enter a valid email address. This will be used for account verification and communication.
- Password: Create a strong password. Filejoker often recommends including uppercase letters, lowercase letters, numbers, and symbols for better security.
- Retype Password: Confirm your chosen password by entering it again.
Step 3: Complete the Captcha
Filejoker uses a captcha to prevent automated signups. This usually involves identifying and selecting specific images or shapes based on a prompt.
- Look at the target shape or image displayed.
- Click on all the similar shapes or images presented in the grid below.
- Follow any specific instructions carefully.
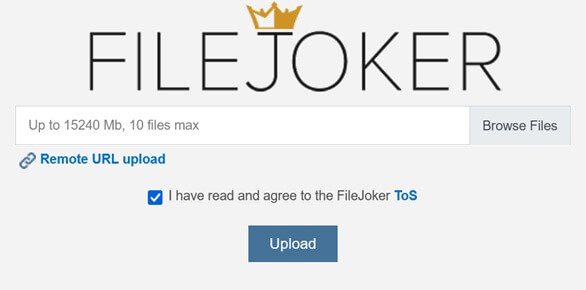
Step 4: Agree to Terms and Sign Up
- Locate the checkbox labeled “I have read and agree to the FileJoker ToS”.
- It’s highly recommended to click the “ToS” link and review the Terms of Service before agreeing.
- Once reviewed, check the box.
- Click the “Sign Up” button.
Step 5: Verify Your Email Address
After submitting the registration form, Filejoker will typically send a confirmation email to the address you provided.
- Check your email inbox (and spam/junk folder just in case).
- Open the email from Filejoker.
- Click on the verification link provided within the email.
- You should be redirected to a Filejoker page confirming your account activation.
Congratulations! You now have a registered Filejoker account, likely starting with the free tier benefits.
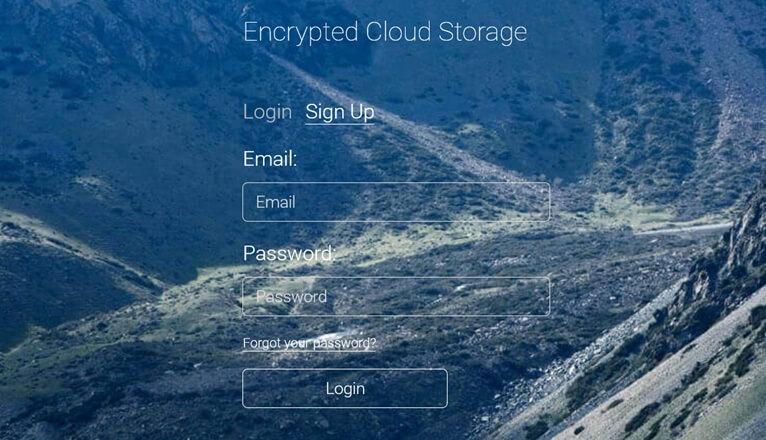
Logging In to Your Account
Once registered and verified, you can log in:
- Go to the Filejoker homepage.
- Click the “Login” link (usually found at the top right).
- Enter the Email and Password you registered with.
- Click the “Login” button.
You should now be logged into your Filejoker account dashboard or file manager area.
Uploading Files to Filejoker
With a registered account (even free), you can start uploading files. The interface might vary slightly, but the general process involves:
- Locate the Upload Area: Once logged in, look for an “Upload” button, a drag-and-drop area, or a file manager interface with an upload option.
- Select Files:
- Drag and Drop: If available, simply drag files from your computer folder and drop them onto the designated area in your browser.
- Browse: Click the “Upload” or “Select Files” button. This will open your computer’s file explorer. Navigate to the files you want to upload, select them (you can often select multiple files), and click “Open” or “Choose”.
- Start Upload: The upload process should begin automatically after selecting files or may require clicking a “Start Upload” button.
- Monitor Progress: You’ll typically see progress bars indicating the upload status for each file.
- Completion: Once uploaded, the files should appear in your Filejoker file list or “My Files” section.
Important Considerations for Uploading:
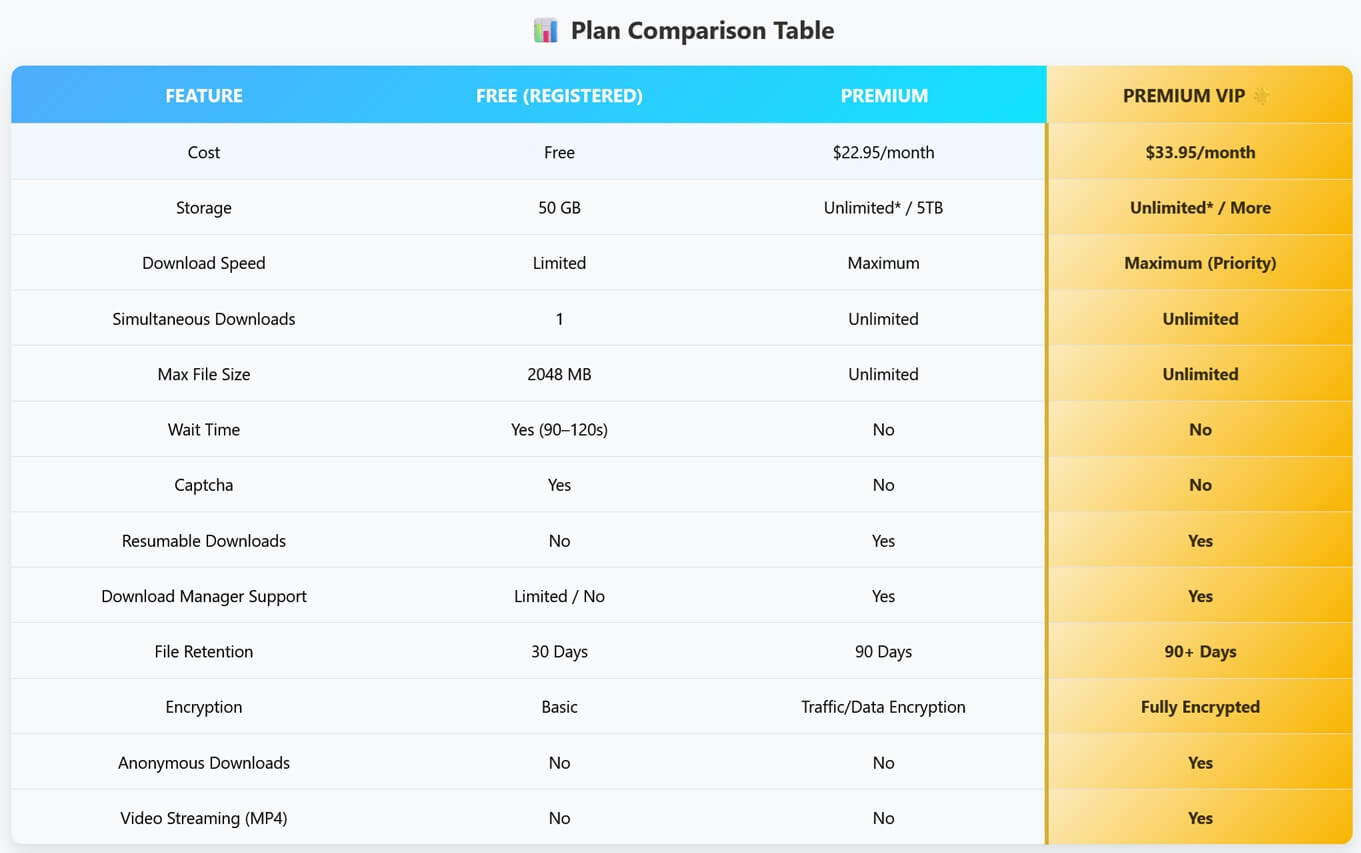
- File Size Limits: Free accounts may have limits on the maximum size per file you can upload. Premium accounts generally offer unlimited or significantly higher file size limits.
- Storage Limits: Remember the storage capacity of your account tier (e.g., 50 GB for free registered users, potentially unlimited or 5TB+ for premium).
Downloading Files from Filejoker
Downloading files is a core function, but the experience differs significantly between free and premium users.
Step 1: Access the Download Link
You need the specific Filejoker URL for the file you want to download. This might be a link someone shared with you, or a link to a file in your own account.
Paste the Filejoker URL into your browser’s address bar and press Enter.
Step 3: Initiate the Download (Free vs. Premium)
This is where the paths diverge:
- Free Users:
- You will likely see options for “Free Download” or “Slow Download”. Click this option.
- Wait Time: Expect a countdown timer (e.g., 90-120 seconds) before the download can begin.
- Captcha: You may need to solve a captcha.
- Speed Limit: The download speed will be restricted.
- No Resume: If the download is interrupted, you usually have to start over from the beginning.
- Single Download: You can typically only download one file at a time.
- Click the final download button once it becomes available after the wait/captcha.
- Premium Users (Logged In):
- You should see a prominent “Premium Download” or “Fast Download” button.
- No Wait Time: Downloads start instantly.
- No Captcha: Captchas are bypassed.
- Maximum Speed: Downloads proceed at the highest possible speed.
- Resume Support: Downloads can be paused and resumed.
- Simultaneous Downloads: You can download multiple files concurrently.
- Click the premium download button.
Step 4: Save the File
Your browser will prompt you to choose a location on your computer to save the downloaded file. Select the destination and click “Save”.
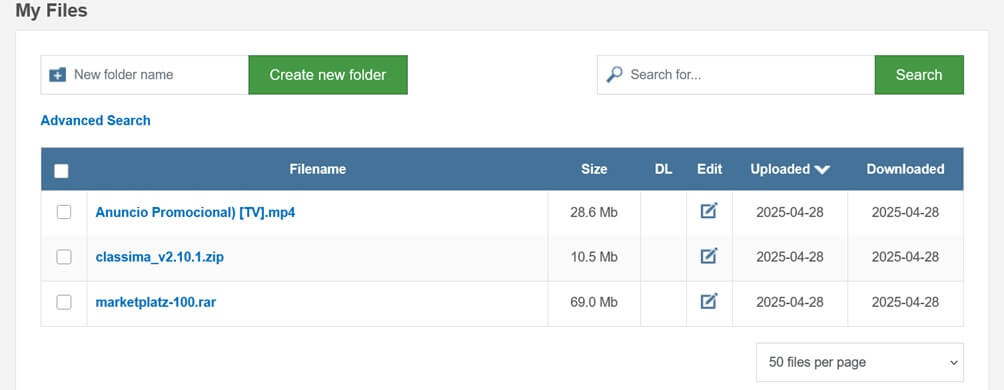
Sharing Files with Others
Filejoker allows you to share files you’ve uploaded by generating a unique download link.
- Log In: Access your Filejoker account.
- Go to “My Files”: Navigate to the section listing your uploaded files.
- Select File(s): Find the file you wish to share. There might be a checkbox next to it or an options menu associated with it.
- Find the Share Option: Look for a “Share”, “Get Link”, or similar button/icon.
- Generate Link: Clicking the share option should generate a unique URL (e.g.,
https://filejoker.net/xxxxxxxxxx). - Copy Link: Copy the generated link.
- Distribute: Share this link with anyone you want to grant access to the file. They can then use this link to access the download page as described in the downloading section.
Sharing Considerations:
- Public Access: Links generated this way are typically public. Anyone with the link can attempt to download the file (subject to free/premium limitations on their end).
- Password Protection/Advanced Sharing: Check if Filejoker offers advanced sharing options like password protection or expiration dates for links (these are often premium features on cloud storage platforms, though specific availability on Filejoker needs confirmation within the user interface).
Getting started with Filejoker involves a few simple steps for registration, uploading, downloading, and sharing. While the free tier offers basic functionality with notable limitations, upgrading to premium provides a much smoother, faster, and more feature-rich experience. By following this guide, you should be well-equipped to begin using Filejoker for your file storage and sharing needs.
Last Update: 23 June 2025 - 06:41
851